

January was a blockbuster month for us in terms of extracurricular learning. We’ve learnt how to use a 3D printer, how to skate, the art of sushi making and now we’ve added iPhoneography to the list.
We thought we knew our way around our iPhones pretty well, but your smartphone is even more powerful that you think. Last week we attended a brilliant workshop hosted by GTA Photography and Curio Trips that blew the minds of even the most tech savvy in the room.

Here are our favourite 5 iPhoneography tips that we learnt at the workshop:
1. Take underwater shots
No fancy equipment needed, just put your iPhone upside down in a glass. Immerse this glass partially in water and snap away. Using the volume button on your headphones as a trigger makes life easier too.
All of our glasses are funny shapes or patterned so we used a vase instead. This had a tendency to try and fall over so do make sure you keep hold of whatever container you are using!

2. Bokeh and creating deliberately blurry photos
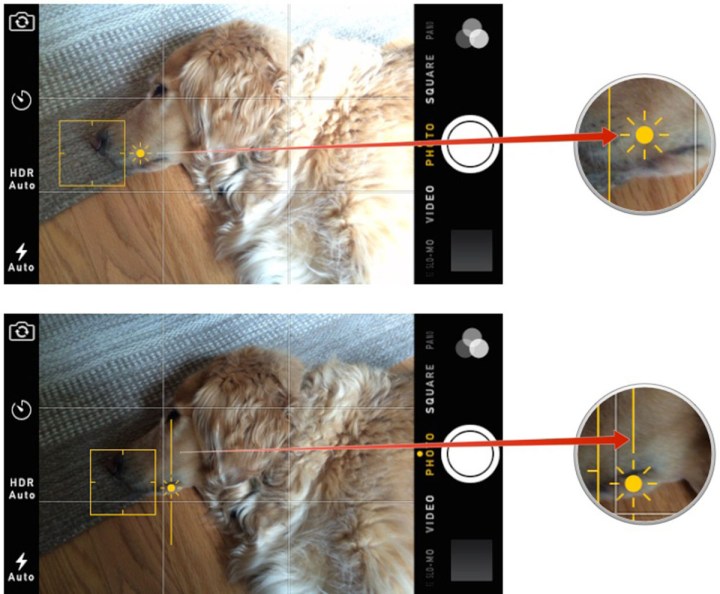
This can be achieved by taking advantage of the camera’s focus lock. Locking the focus on your iPhone is easy, and you’ve probably done it before by accident. By tapping the screen you can focus on a particular spot, hold it down long enough and “AE/AF Lock” will appear. To create the blurry effect, lock the focus on something a few inches away from you, then aim the camera at your subject.
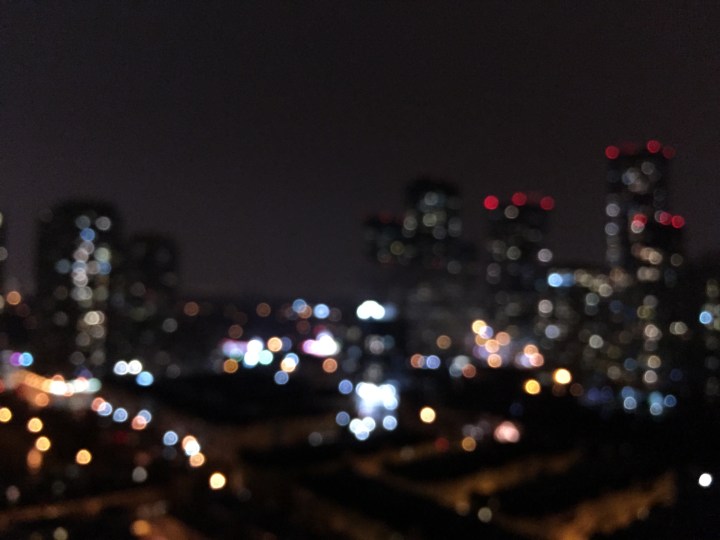

The iPhone is pretty bad at taking photos at night so this will hopefully be good way to get some great shots. An excuse to go down to the islands to get that perfect Toronto skyline viewpoint!
But, why would we want a blurry photo anyway? Surely we want a nicely defined and clear image? The process above describes bokeh, which in the world of photography, is the aesthetic quality you will see in the parts of an image which are out of focus. So you can either get a photo where the object you focus on is in the foreground – whether it be a person, wildlife, a flower or an inanimate object – is nicely in focus, and the background is all blurry, or the entire image is blurry. The latter works well with city lights, as above, or with a collection of small lights, such as in Christmas decorations. Whatever the subject of the photo, the aim is for the blurred effect to be aesthetically pleasing and one that positively contributes to the image.
3. Adjust the exposure settings to make your images brighter (or darker)
This trick was one that wowed the audience the most – it is possible to change the exposure and make your photos brighter or darker. Who knew?! To do this tap on the image to bring up the focus point, then tap and hold on the sun icon and you’ll see a slider that allows you to adjust the exposure.
Not being able to take photos in bad lighting was one of the biggest drawbacks for me with the iPhone camera so I’m hoping this new trick will help me capture some better shots.
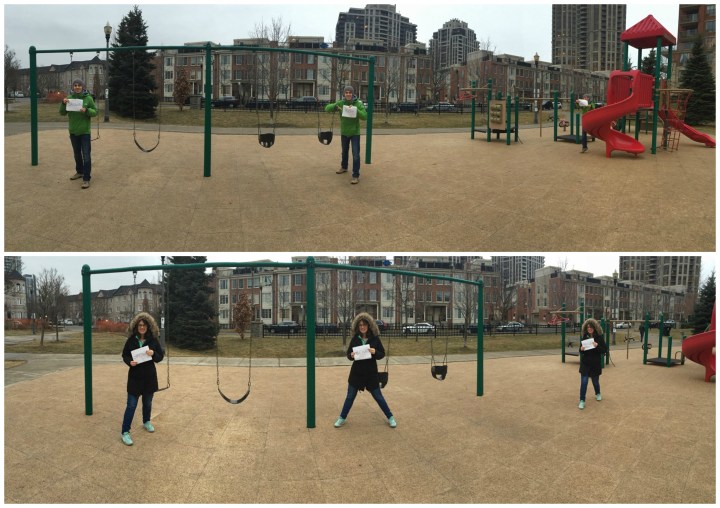
4. Have fun with panoramic shots
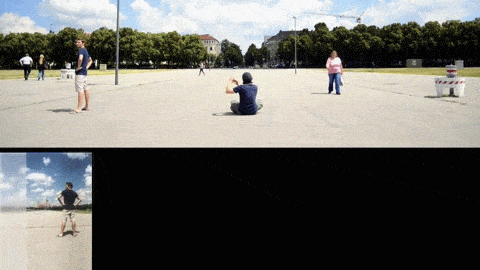
Want to appear in a photo more than once without the need to stitch several images together? You can do this with panoramic mode. By quickly running behind the person with the camera it’s possible to be in shot several times. This is best explained in the GIF below:
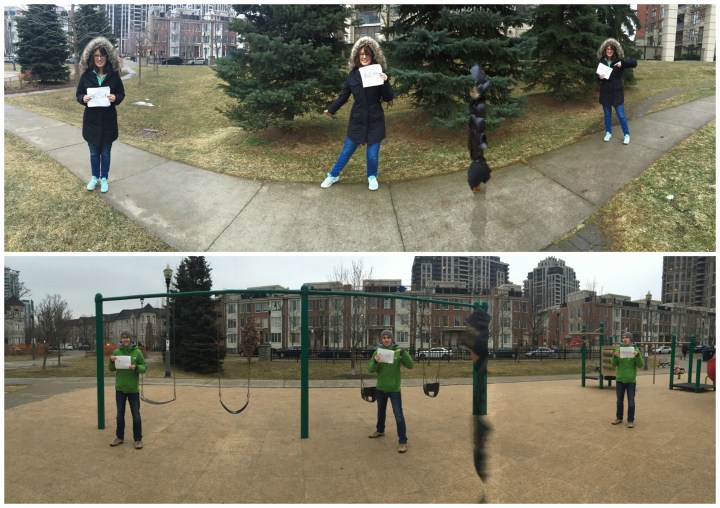
We had a play around with this in our local park and it’s harder than it looks, especially when dog walkers and kids get in your photo! The trick is to ensure the person in the photo is moving quicker than the iPhone, we found that holding the iPhone still whilst the other person runs works too.
5. Edit with some amazing free apps
There are hundreds of photo editing apps out there, many of which are free, and they do a lot more than just add nice filters to your images. So no longer are we restricted to the limited editing options that come as standard on an iPhone, those which are only available if you are posting to Instagram, or extracting our photos to Photoshop on our desktop.
As a result of the workshop, we’ve been trying out Snapseed and VSCO, both of which offer advanced editing tools on your iPhone.

So there you have it, it is possible to take great photos with your iPhone. To prove it, here are some of our favourite Instagram snaps taken on our phones.
Let us know if you have any other great iPhoneography tips!
Emma and Stewart


Great article and it is great to see you already using those principles we learned! Great shots too!
LikeLike
Great tips! I needed these!
LikeLike
Fantastic! I wasn’t aware of some of these tips!
LikeLike
“I say I say I say, my cat’s got no nose” “How does she smell?” “Terrible”
The old ones are the best ones!
LikeLiked by 1 person